Hey friends!
Brianna here today and I’m sharing a new layout featuring the new Little Dreamer collection. I used the Little Celebrations portion of this collection on my last project, so I thought it would be fun to follow that one up with a Little Dreamer layout. Here’s my page:
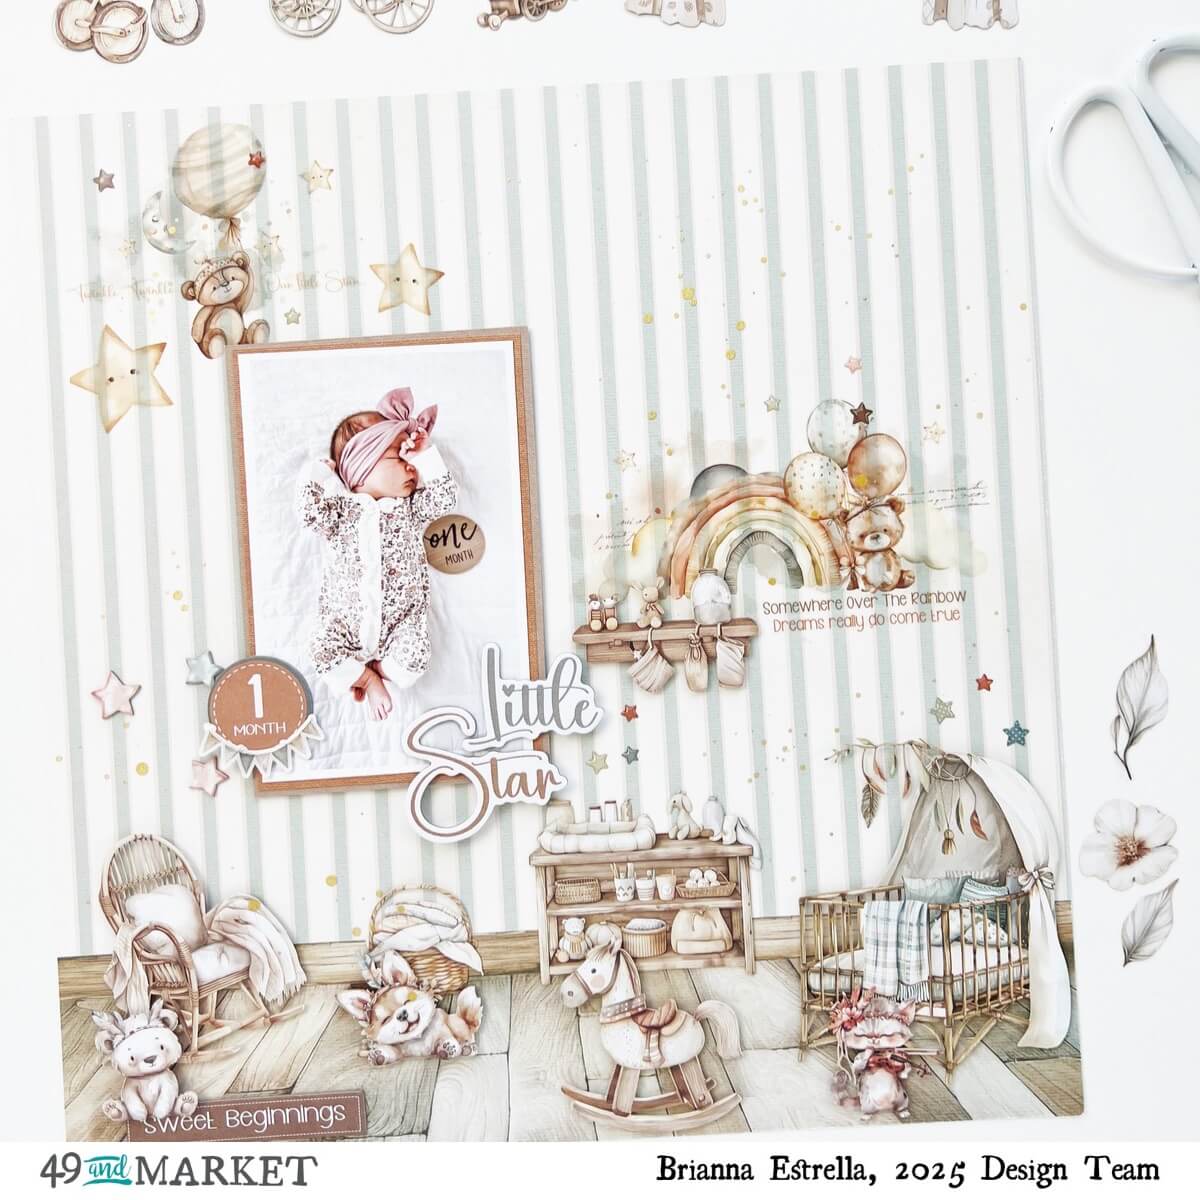
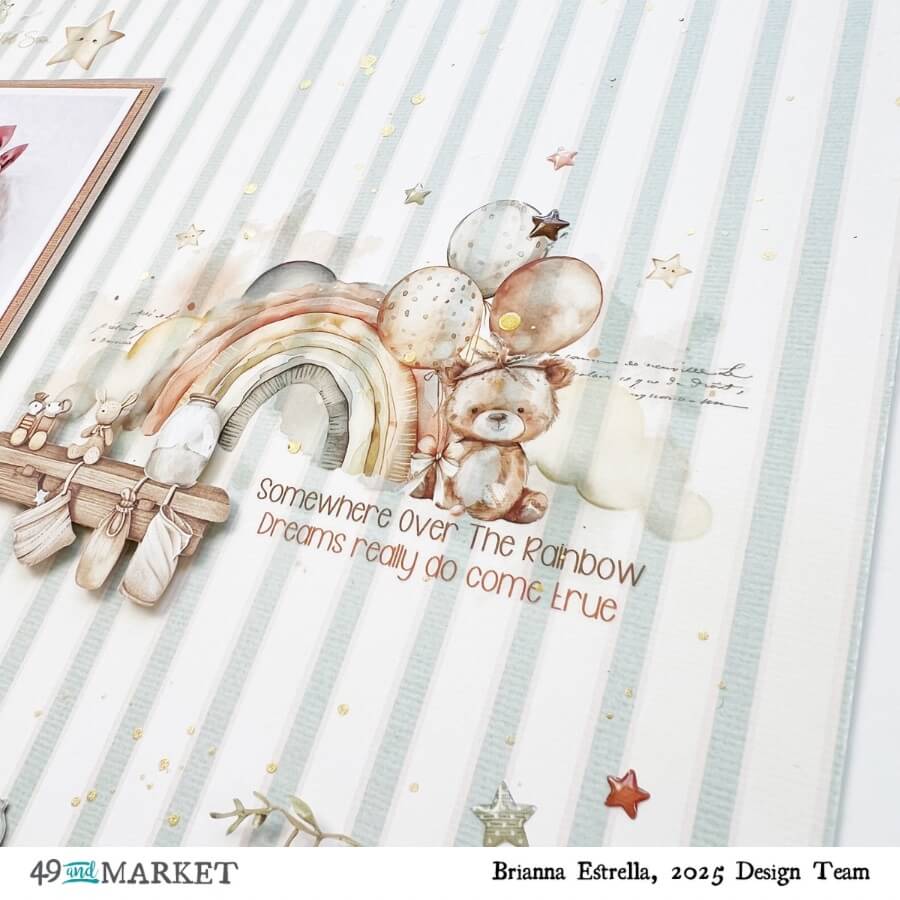
To start, I went through the 12×12 patterned papers to see which one would inspire me. I like to do this with the 49 and Market papers because a lot of them have beautiful backgrounds where you can simply build your page on top of them and it’s so simple. I actually ended up wanting to use the backside of the cover sheet. It was the perfect background to create a scene. First, I matted my photo using a couple of 6×8 Papers, popped it up on foam tape and adhered it down towards the left side of my layout. I then pulled out the coordinating Rub On Transfers and chose a few to add to that background paper. I wanted them to mimic wall decals and I think they look so cute!
Next, I went through the Laser Cut Elements and basically chose all of the pieces that would create a nursery theme at the bottom of my page. I chose a rocking chair, a cute little dog that looks just like ours, a crib and a few other adorable pieces.
If you didn’t know, our last name is Estrella and in English, it means star. I was so happy to be able to build the perfect title using the Chipboard Words pack. She’s our Little Star and I can’t believe how little she was in this photo!
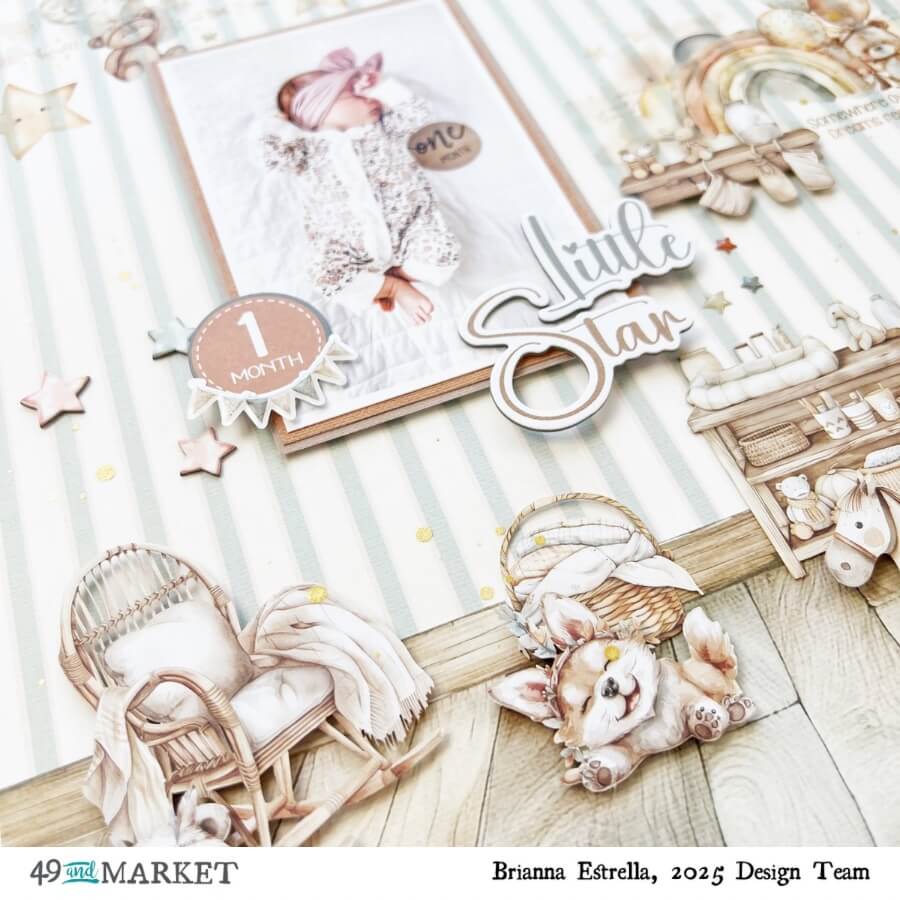
To finish off the rest of my page, I added a little ‘1 month’ circle piece from the Chipboard Words pack and also sprinkled in a bunch of the stars from the Epoxy Coated Sticker sheet. Here’s one last look at this sweet page of my girl:

49 and Market products:
- Little Dreamer 12 x12 Collection Pack – 49 and Market
- Little Dreamer – 6 x 8 Collection Pack – 49 and Market
- Little Dreamer Laser Cut Element Set – 49 and Market
- Little Dreamer Chipboard Words – 49 and Market
- Little Dreamer 6×12 Rub-on Transfer Set – 49 and Market
Thanks so much for stopping by today, I hope I’ve inspired you in some way!
I’ll see you in my next post friends!