Hi everyone,
it’s Rebecca with you today and I’m so excited to be sharing my first project with you as a member of the team! For this project, I’ve used the stunning ‘Wherever’ collection. I’m not much of a traveller these days so don’t have an abundance of travel photos – but I’ve still really enjoyed creating with this collection and have made several layouts which just goes to show how versatile it is.
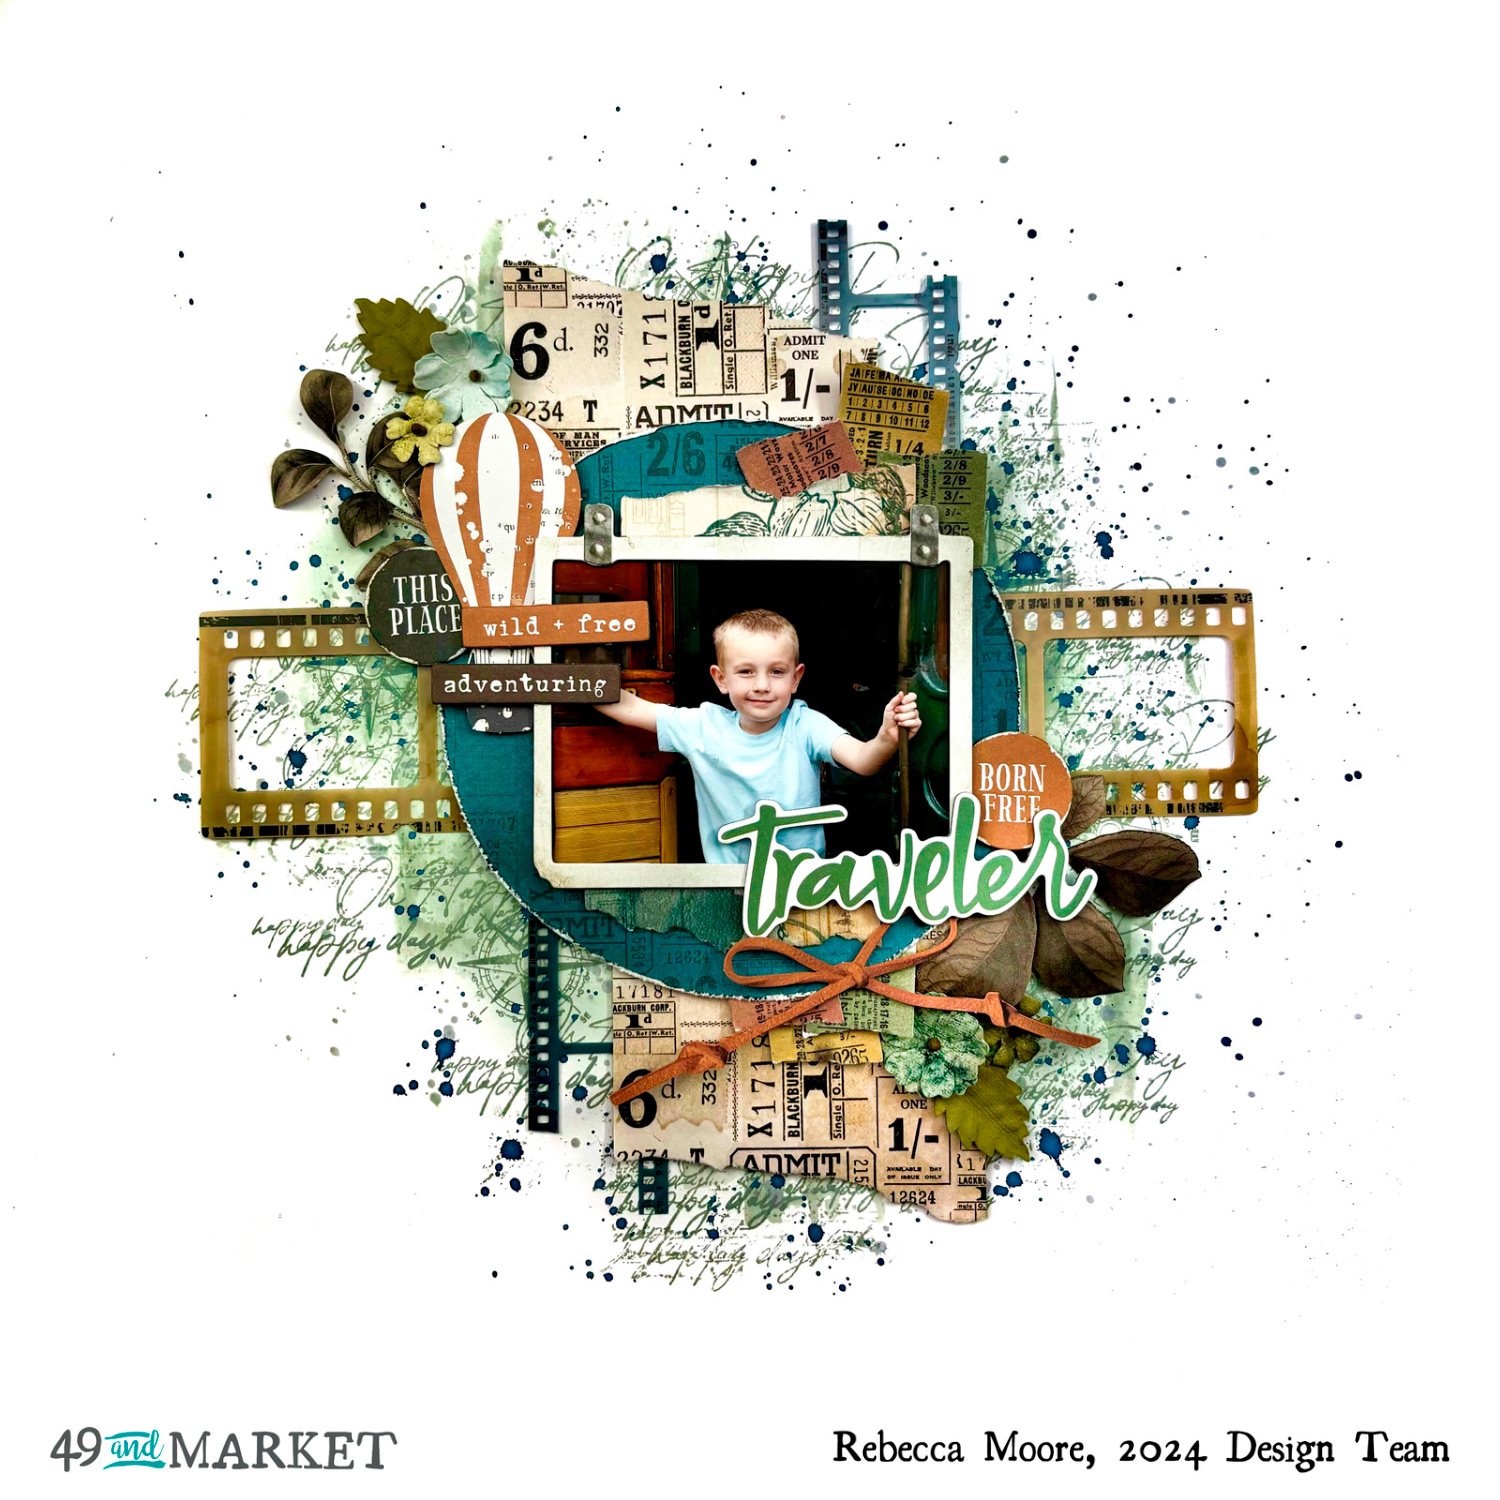
The photo I’ve scrapped here is of my little boy boarding a vintage steam train. Whenever I think of trains I think of tickets, and so I was drawn to the pattern on the reverse of the collection cover, which is full of vintage looking ticket stubs. I cut a strip about 4 inches wide and 8 inches long and tore along the top and bottom edges at an angle to introduce some texture to the layout. I then cut this strip in half and staggered the two pieces slightly. On top of these strips, I added a blue circle cut from the reverse of the ‘Just Drive’ paper. At this point, I was sticking everything together, but not sticking anything to my white cardstock – you’ll find out why shortly!
Crossing behind these patterned papers, I added two film strips from the Acetate Assortment – purposely selecting colours to match my photo. The acetate film strips are one of my favourite 49 and Market products and I use them whenever I can on my layouts.
Using one of the frames from the Ephemera Bits, I added my photo to the centre with a layer of foam behind it. I love to add lots of foam to my layouts to create layers and dimension.

With all of the larger elements now in place, I began adding the smaller pieces. I’ve used the word ‘traveler’ from the Chipboard Words for my title, and also added a couple of phrases from the same pack.

From the Chipboard Bits, I selected several smaller pieces to create some clusters going diagonally through my photo. I then built on these clusters by adding some leaves from the Laser Cut Elements, curling them around a straw for dimension and to make them look more realistic. I finished these clusters off with some paper flowers. These bring amazing texture to papercrafting projects so I always love to keep a stash of them in various colours. For this layout I’ve used Royal Posies in both Olive and Ocean Jade.
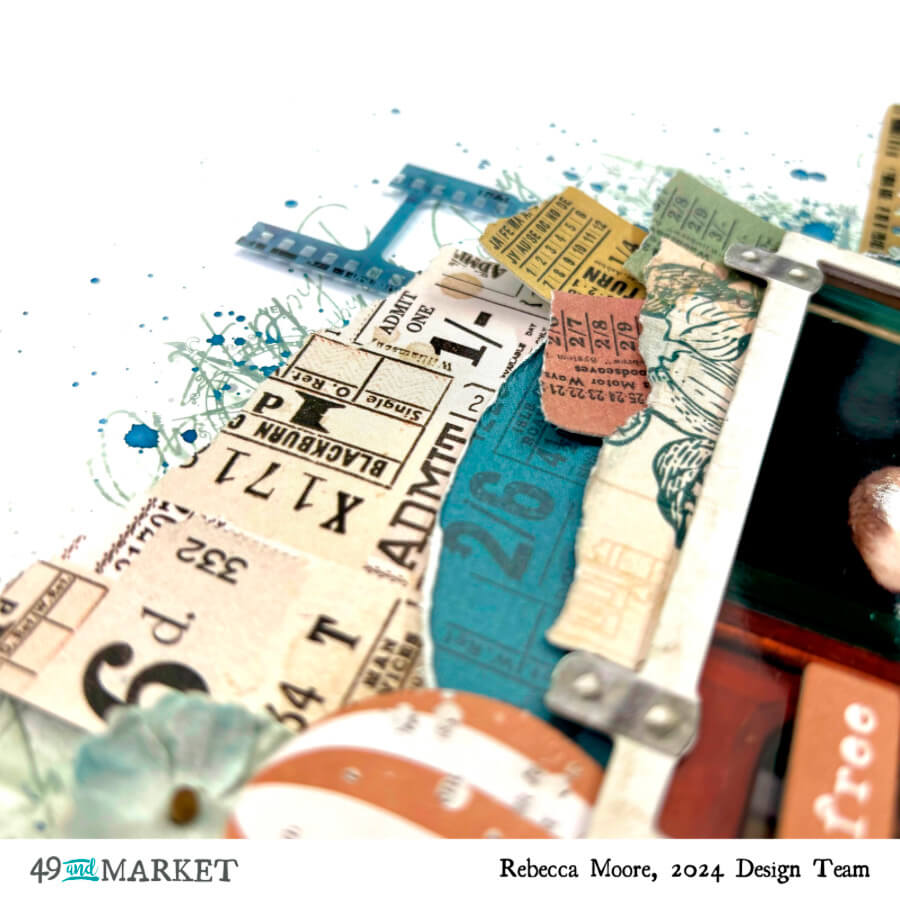
I decided that no amount of tickets would be too much (!), so I layered several stubs from the Epherma Bits above and below my photo.
Remember I said earlier that I was sticking everything together, but not to my background? Well, here’s why… I quite often decide to add mixed media to my layouts AFTER I’ve created them – which is not always easy to do! I’m not one for starting off with mixed media. I like to build my layout and then decide if mixed media would add anything to the layout or enhance it in any way. So my trick these days is to stick everything together so that if I do decide to add mixed media (like I did with this layout), I can easily move everything on and off the page in one go until I am happy with my background.

I rummaged through my collection of Distress Oxides to see which colours I thought would work well with the Wherever collection. I decided that for this particular layout, ‘Iced Spruce’ would work really well as it almost matches the colour of my chipboard title. I love it when I have just the right shade! I watered down some of the ink on some packaging and then applied it to a sheet of white cardstock using a brayer. Once this had dried, using the same colour of ink, I added some stamping using a compass stamp from my stash, along with a 49 and Market stamp from the Vintage Artistry Dream Stamp set. I then finished the mixed media off with some ink splatters – in the shades ‘Iced Spruce’ and ‘Unchartered Mariner’ (which matches the blue acetate filmstrip perfectly!).
Once everything was dry, it was simply a case of adhering my layout to the background. As it was already all stuck together as one piece, all I had to do was add some double sided tape to it and position it in the centre of the page.
49 and Market products:
- Wherever 12×12 Collection Pack – 49 and Market
- Wherever Laser Cut Elements – 49 and Market
- Wherever Ephemera Bits – 49 and Market
- Wherever Chipboard Set – 49 and Market
- Wherever Chipboard Words – 49 and Market
- Wherever Acetate Assortment Set – 49 and Market
- Royal Spray – Olive – 49 and Market
- Royal Spray – Ocean jade – 49 and Market
Thanks so much for reading.
I hope you’ve enjoyed this layout as much as I enjoyed creating it.
Wherever really is a gorgeous collection and I can’t wait to share more of the layouts I’ve created with you.
Take care,
Rebecca x
