Hey friends!
Brianna here today and I’m so excited to share my first layout using the just released, Starlight Dreams collection. This collection is so beautiful and I really hope you like this page:
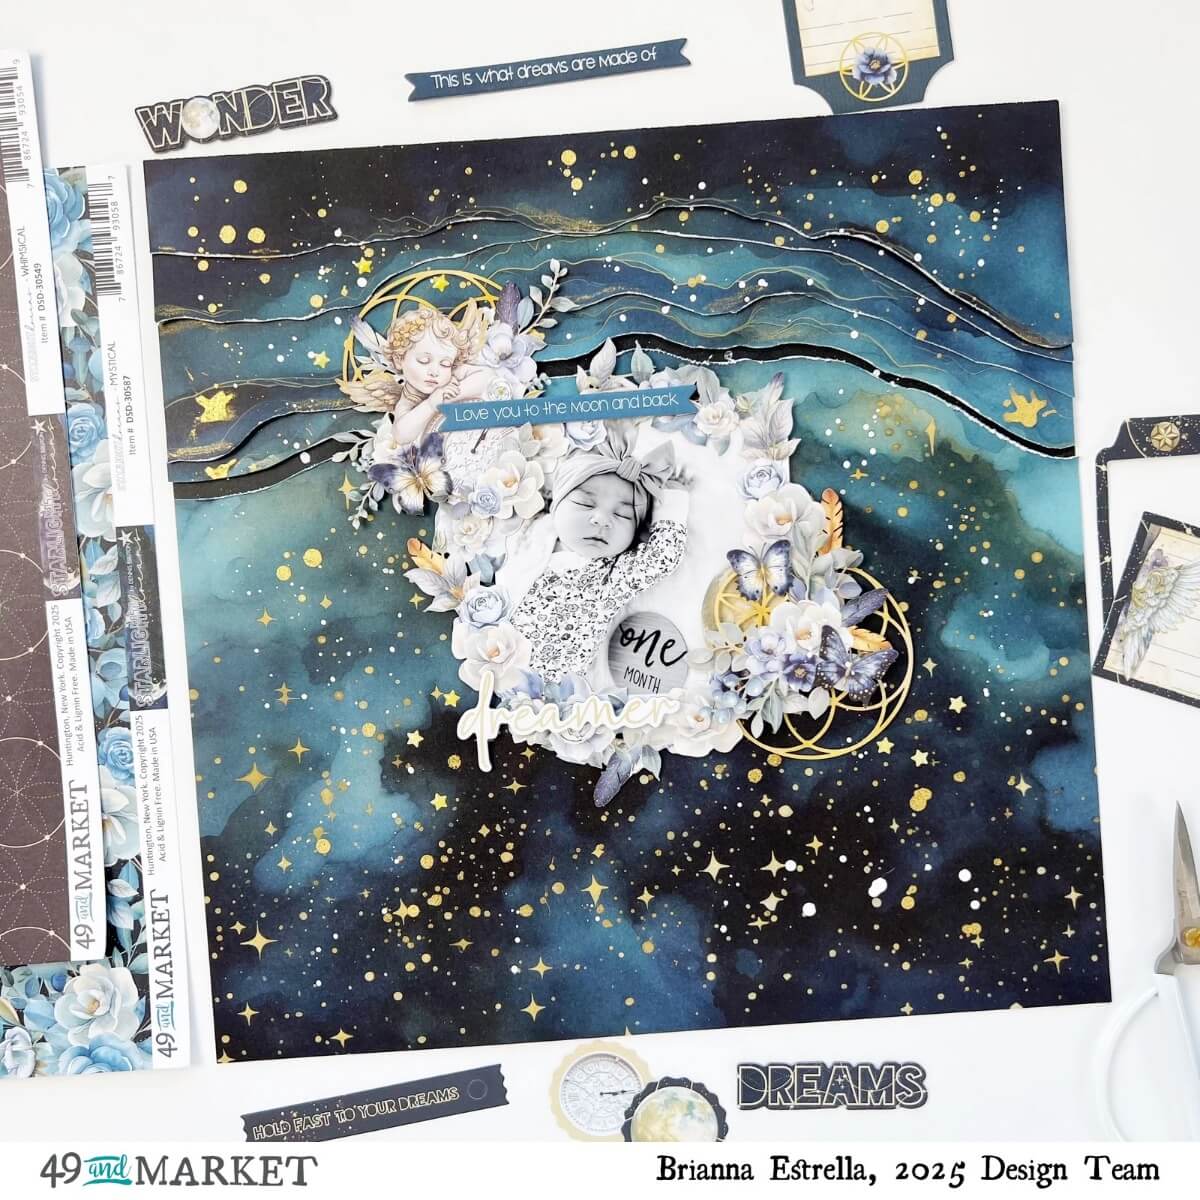
This is one of my favorite photos of my daughter. I can’t believe how teeny, tiny she was. It was definitely the perfect photo to use with this collection! To start, I went through all of the 12×12 patterned papers and immediately chose the Enchanting paper. It has this beautiful, dark and rich galaxy pattern along with some gold wavy lines. I knew right away that I wanted to cut along those lines and then layer them together to create some interest and dimension on this page. I cut along a few of those lines, distressed the edges and layered them together. I popped them up on foam tape and adhered them to the Solids 1 paper from the coordinating Solids paper stack. I love how it turned out!

My photo is sized at a 4×4 and I was able to fit it nicely into one of the large floral frames from the Laser Cut Element pack. I popped the whole piece up on foam tape and adhered it to the center of my page. The soft florals along with my black and white photo really pop on top of that beautiful background paper.

Next, I embellished using a few more Laser Cut Elements and chose a phrase from the Chipboard Words pack for my title. I finished off my layout by sprinkling in some gold ink splatters and some of the Epoxy Stickers.

49 and Market products:
- Starlight Dreams 12×12 Collection Pack
- Starlight Dreams Die-Cut Elements
- Starlight Dreams Blendable Rub-On Transfers
- Starlight Dreams Chipboard Words
Thank you so much for stopping by today, I hope that I’ve inspired you in some way. I’ll see you next time friends!